Lenovo Thinkpad Universal USB-C dock firmware issue with AMD-based E-series laptops.
Issue arises when users or admins upgrade the dock to the .91 version using Vantage, Dock manager, or manually with a downloaded executable.
I can attest to seeing a working dock have the following issue after the upgrade from a previous version.
The primary issue with the 3.0.91 firmware is that any displays attached to the USB-C dock will fail to work with these AMD systems. In several cases, with multiple generations of the E15 we saw this happen.
Running the updater will give errors, mostly that it can not read the current version of the various hardware revisions, and it will eventually fail.
Other laptops will work with the dock, both Windows and macOS alike. The dock is usable for USB, ethernet, and audio, but video will be non-responsive and not shown as available.
Resolution:
Firmware downgrade!
Using this recent Reddit thread I was able to get the 3.0.80 firmware from Lenovo.
Using a Dell laptop with USB-C I was able to successfully install the previous firmware version and downgrade to 3.0.80. All functions return and the dock is completely usable.
I’ve done this without issue on 4 of the 40AY USB-C docks and all devices which were not previously working are now operating properly.
Update – 01/08/24
Lenovo has since released the 3.0.92 firmware update for these docks and I can confirm that it avoids this issue. One dock that had been downgraded was successfully upgraded from .80 to .92 and all functionality worked. Another was a recent .91 firmware install that I was unaware of, a successful downgrade, and then an upgrade to .92.
My journey to the current project starts pretty far back, in relative terms, and with a simple setup. I had been using a 24″ iMac as my primary computer, running Windows with BootCamp, and wanted a place to store media for use on the LAN or available elsewhere through OpenVPN or a service you may remember, Splashtop. This system was a quartet of 1.5TB Seagate drives on an Intel DP55WB board with an i5-750, some RAM, and a boot disk. It ran Windows well, and the disks were set up in the BIOS as a RAID5 array, something Intel used to include on workstation boards like that. It was good. It was also overkill, big, a little too noisy, and I wanted something smaller.
My supervisor at the time was looking into a dedicated NAS and we both arrived at the QNAP brand nearly simultaneously. I went with the TS-459Pro-II and he got something similar. It was a two-core Atom CPU with four bays and expandable RAM. Decent web interface, dual LAN adapters, and it was quiet/cool. This was in early 2012, and disks were hard to get due to a severe flood season in Thailand, where many companies were building them. I was able to get four Samsung Spinpoint disks, 2TB each, and assembled everything. It’s been a solid system for streaming, file storage, and some occasional remote use with OpenVPN. I am still using it right now because it’s low-impact and QNAP keeps releasing maintenance firmware updates.
To replace the QNAP, for storage capacity reasons, I looked around for options. A used QNAP four-bay was almost always available locally, but reading reviews of the newer hardware gave me pause. Mentions of backplane failures and other issues kept me from picking up something second-hand. It didn’t help that sellers seemed to think that these 5-10 year old appliances were worth so much. Patience paid off, however, and that convergent interest also came about again with my now colleague.
We both still had our QNAP units running, and he’d also done a rackmount setup also, but was really looking to retire some old, hot, power-hungry enterprise server hardware and consolidate if possible. I’d just joined the UT Home Labs Discord server and seen how much people were talking about NASes, so got a bit enthusiastic about a BYO solution instead of something purpose-built. We settled on unRAID, a solid piece of software that has a generous trial period, and reasonable prices for a lifetime license. I was able to get it set up and use Docker for the first time, finding a bit of a new world in features that a NAS platform could offer.
The hardware for this NAS came from a used U-NAS NSC-400 four-bay unit, which the previous owner sold with power supply, motherboard, CPU, and RAM. It is a Haswell Core i3-4330T, 8GB of RAM, and four HGST BLE 4TB disks. The setup was easy, it runs quieter than the QNAP, and the performance was also a good step up. I run Deluge, pi-hole, Crusader, and a few more Docker instances on it with ease. Barring some puzzling issues with SMB speed on macOS, it’s been very good and worth the 12-disk license cost for future expansion.
I was able to consolidate many volumes of data, with an unspeakable number of duplicates, into this four-disk array, but I found that even with a doubling in capacity I was uncomfortably close to the nearly 12TB size of the array. What then? Add some 8TB disks one at a time and expand the array? I didn’t like that idea because it was committing to base hardware that was already a bit old. What I needed to do was make this a stepping stone to the next long-term solution.
Where it’s going
My first searches for NAS enclosures did surface SilverStone as an option, but what cemented them is a friend’s experience building something similar. He’d chosen the CS series, with an all-in-one AMD-based motherboard sporting 12 SATA ports onboard, with two disk pools for workspace and cold storage. I found it clever, and kept it in mind. Later, finding the DS case design more to my taste, I then naturally kept a DS380B in my eBay watchlist for…a while. Some more research led me to finding that the ASROCK AMD board combo he’d used was, well, more pricey than I was willing to spend.
So, for the third time now my colleague and I were doing something very similar. His initial experiences with unRAID were good, but then fraught with issues when he subsequently tried to add disks, then swap in a RAID/HBA controller, then a new motherboard, etc. He learned a lot, and finally settled on an Intel i9 that became available, 12-disk case, 16-port card, and even a GPU for some Steam gaming in a VM.
The turning point is when I was able to then acquire a mini-ITX ASUS PRIME H310I-PLUS motherboard with an Intel I7-8700 CPU (Coffee Lake 14nm), 8GB RAM (DDR4 2400), and the wheels started turning. The board has a single PCIE slot, but does have a rear-mounted m.2 slot for SATA/NVME disks, and plenty of RAM capacity. Four SATA3 ports, USB3, and a focus on reliability over performance. As of this writing I am going to stick with the DDR4-2400 RAM, but will likely up the game soon to at least 16GB of 2666Mhz.
The hardware
So, here’s how it’s panning out. I did settle on the SilverStone DS380B. This case offers eight 3.5″ externally accessible drive bays, with rails, that can accommodate SATA and SAS disks due to using an integrated backplane. More on that later. There’s additional space behind the vertical drive cage for 4 2.5″ disks, which is a good place to put some laptop or SSD disks to use as cache or scratch space. They’re out of the way of airflow and cables, so it’s a neat way to get 12 total disks in, or more if your motherboard has interfaces like this ASUS does.
Setting up the motherboard was simple, as mini-ITX is just four screws. The DS380 drive cages come out easily with a few screws and give unfettered access to the interior. Connecting power, front panel connectors, and fan headers is trivial. I’d asked the UT Home Labs for some advice and was pointed enthusiastically towards the LSI 9207-8i for my disk controller needs. It has two miniSAS connectors for use with up to eight drives, is very affordable at around $30USD, and seems to just work, which I’m all-in on. The case does require a specially adapted cable for use with a card, however, so look into the SilverStone CPS03 cable and make sure you order two. They’re cheap. The HBA card does have some minor clearance issues, so installing it with the full-height bracket does mean that either the DS380’s graphics card support fixture on the drive cage needs to be trimmed, or simply removed entirely. Five screws later the clearance wasn’t a problem.
Getting the system up and running was a little tricky. The onboard SSD still had Windows 10 installed on it, so I was pleased to see it boot successfully on start. I was a little puzzled that the SAS card BIOS didn’t show up on boot, nor did the disks in Windows’ Drive Management. The “Mustang” LSI controller did show up under Storage Controllers, so at least I was confident that it wasn’t a card issue. Some poking around and help from a UT Home Labs admin got the SAS BIOS loading, but disks were not showing up. The trick to getting the card BIOS to show was enabling CSM compatibility in the motherboard’s BIOS instead of insisting on UEFI only. This was a very important step, so if you’re finding that your HBA/SAS card BIOS isn’t displaying before the motherboard’s logo, check for it.
We then connected an SSD to one of the SATA connectors coming from the LSI controller, to test and make sure that the card and cable, which is special to these cases (CPS03), functioned as hoped. The drive showed up on a refresh, so we were confident that things were okay. Some more digging found that the reason was likely some misunderstanding of the backplane ports. The DS380B and other SilverStone products in this range have a fully-integrated backplane PCB set up with one or two Molex power inputs, SATA/SAS compatible drive slots, fan headers, and interface two ports for each drive bay. One is labeled SAS, while the other is SATA, numbered 0-7. I’d naturally plugged the CPS03 SATA-connector type cables into the labeled SAS ports, but this wasn’t proper procedure. It’s apparently possible to use fewer than eight ports from the card with 8 disks through the use of the labeled SAS ports, somehow using the topology of the backplane and SATA cables as jumpers.
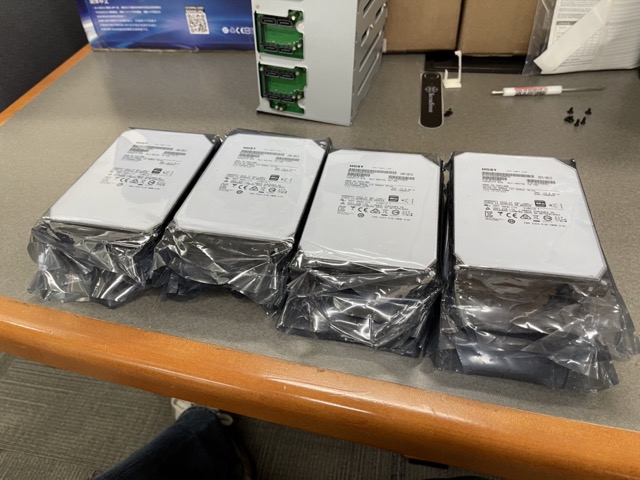
After moving the cables to the labeled SATA ports from the SAS ports on the backplane, and a full power cycle, the LSI card was happily seeing all eight of the 8TB SAS HGST disks I’d procured for use in this system. Yes, that’s right, another doubling in drive capacity and also now in number. QUAD DAMAGE!
Disks online, now it was time to test these used units. It was a great opportunity to use a tool that I’d only recently become aware of, but is fit for this purpose. Ventoy allows you to have a single USB-stick, with as many disk images as you can put on it, bootable to each image on the USB drive using a menu. I first downloaded the latest DVD image of Knoppix, which didn’t load, but then grabbed Ubuntu. After successfully booting to Live, I loaded up GParted, erased all of the volumes on each disk, and then was advised to run badblocks on each disk. With the i7-8700 having a plethora of cores, I started up eight terminal windows, each running badblocks on a disk. It’s not processor intensive, but It’s nice to know that this new box will have more horsepower than I will likely need, while also being somewhat efficient in power, all the while holding a total of 6 cores/12 threads at the ready if needed. A sizeable step up from the Haswell i3 and completely eclipsing the lowly D525 Atom in the QNAP appliance.
The power supply is the last item to be added, and the form factor is a little unusual, but not what I’d call specialized. SFX is a common Small Form size, used in systems that need good power capabilities but using less volume than a traditional ATX footprint. Think of the ATX size, but on a slimming diet, where most of the extra space is seemingly gained in the vertical dimension. There are 1000W variants of this specification, so output power isn’t lacking in availability, that’s for certain. I was able to acquire a SilverStone 500w SFX-L unit, with the -L denoting the version that’s 30mm deeper than the standard spec. This did cause me a little grief with the drive cage due to the modular cable output interfering, but I was able to make it work. The advantage of -L seems to be that it can fit the quieter 120mm fan size. The DS380 also officially supports that version.
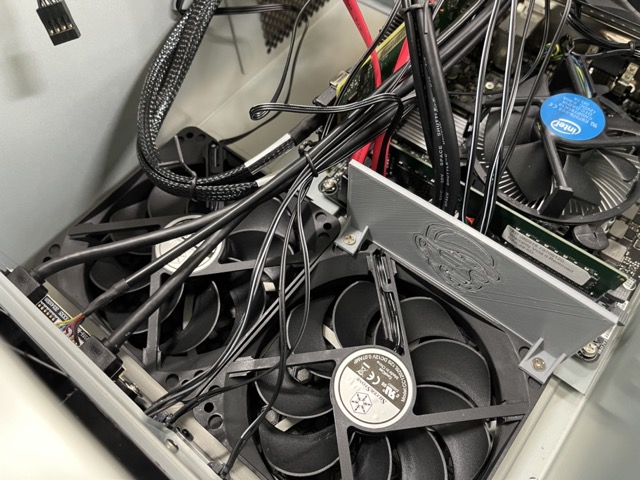
One of the complaints and concerns about the SilverStone case I’d heard about from my friend is drive cooling. The DS and CS have at least three 120mm fans drawing air in on the side of the case, and out through the back and power supply. The side-mounted fans do blow directly at the large disk cage, but the airflow isn’t obliged to stay the course and flow over the array. Ingenious owners of these cases have developed 3D printed baffles that screw into the fan’s mounting holes to forcefully direct the airflow over the drive cage. This would cause issues with using a large GPU in the case, and very long SAS cards also. Modifying the baffles for the miniSAS connector to clear is something necessary with the LSI card I’m using, as the connectors point towards the front of the case and extend to the fans.
The real challenge is going to be migrating data, and doing it without upsetting what’s already been configured. Ideally I’d like to maintain what I have, but completely change the hardware. This is a feat that wasn’t possible using a device like the QNAP in traditional RAID5 arrays. Disks in arrays like that don’t need to be the same size, but they must all be at least as large as their companions, if not larger, but any capacity above and beyond the smallest drive size is inaccessible. unRAID and the xfs filesystem are adept at making drive pools from disks of disparate sizes work. It’s clever, and the only real requirement is that your parity drive is at least as large as the biggest in the array.
The plan is this: Slowly and methodically rebuild the existing array one drive at a time. If I’d purchased SATA drives I would have considered doing this in the old enclosure. In some ways I’m glad that this wasn’t an option, as the H81I-PLUS ASUS board has a split SATAII and SATAIII array of ports, with two each. Moving the current drives, with parity drive, to the new system, is the first step. With only one of the new drives as the fifth drive available, unRAID can copy it as a second parity disk for the array. Remember, the parity disk is very important, and it can be larger than the others in the array. This process should take some time, but when it’s done I should then be able to stop the array, pull out the smaller parity disk, and then work on the data disks. Do this three times and it should be a new array with four drives, all 8TB, with double the capacity. Real Ship of Theseus stuff right here.
https://wiki.unraid.net/The_parity_swap_procedure
https://www.youtube.com/watch?v=ADlip32yw8E
With that done, I should be able to return the original disks to it’s former home, where I could rebuild the array if wanted. Using unRAID, I will be able to then add some of the additional drives to the array, with as many as 12 total. I do plan on using either an SATA 2.5″ or the m.2 SATA drive as cache, which I’ve not done as of yet. It may also be prudent to leave one or two of the big disks dormant and spun down, as backups should either a disk fail or my storage needs suddenly change drastically. This flexibility is why unRAID or TrueNAS are really the best choices for users who want to be able to do more with their storage if the need arises.
Will there be a backup? Maybe. Services like Backblaze are available, though more expensive if run on a NAS, but should really be considered as an option. I do also have a QNAP TS-004, which is a USB3 four-disk external enclosure with 4x4TB in it presently. Shucking some larger SATA drives into this appliance would make for a reasonable backup endpoint, so that’s also a possibility.
So, how did it go?
Despite trying to follow instructions on how to copy the existing parity disk to a new one, I failed to get it right. This resulted in a 16-hour rebuild of both the old and new parity disks. I’m not really in a rush, but my understanding is that a copy would have been much faster. Oh well. I even got this wrong the first time around, accidentally assigning a 4TB disk as Parity 1 instead of Parity 2. This meant that I had to assign an 8TB disk as Parity 1 and start the sync over again.
As for the data disks, well, this is the longest part of the process. Each of the data drives needs to be removed from the array, then the array is started, stopped, then started with the replacement disk in place. A drive sync is then run on the new disk, which takes…a long time. Repeat as many times as you have disks. In the end, however, all disks will be replaced and we’ve arrived back at port with what could arguably be called the same ship.
Next will be adding an SSD cache disk, or disks, in the form of Samsung 850 Pro SSDs connected to the motherboard’s SATA port. This will give us a much faster write speed to the array, even though it does risk that data because the cache write isn’t immediate. Mirroring two SSDs, which I’m likely to do, mitigates this risk somewhat.
Finally, I need to remove the 4TB drives from the enclosure and swap in the remainder of the 8TB disks. Then it’s a matter of deciding a few things: Do I want multiple parity drives? Do I leave 1-3 drives spun down as backups for capacity or reliability? I most certainly do not need 56TB of space right now, nor will I in years, but it’s there for use if wanted or needed. This is the flexibility built into some of the decisions made for this NAS, namely the case design and number of ports on hand.
Wrap Up
With all of the disks installed, a mirrored SSD cache array, and everything powered up, it really was like walking onto the same boat, but things just feel a little nicer, slicker, and faster. It’s a little noisier than the U-NAS enclosure, but five fans and eight spinning disks will make some sound pressure. Docker images still work, but load and update faster. SMB file listing issues that I had previously experienced are now gone and the SMB read speed is much, much better. Temperatures of the lower four drives, which are unassigned devices, was much higher than it should have been, was mildly concerning. This was especially odd when the top four disks are 5-8C cooler while being blown on by the same sized fans. A day later and the disk temperature did settle into the mid-30s and have stayed there since.
I still smile when I see 12 threads to use, and a late upgrade from 8GB to 32GB RAM (2xDDR4 2400) means that VMs are now likely going to be a thing. I’ve done some compressing of file-dense directories, which contain 10k- to 100k- files, and it’s amazing to watch the cores and threads all be used. Next could be expanding the array with a second parity disk, one or two more data disks, and possibly a cold drive ready for an emergency. This arrangement gives me much more capability, flexibility, and reliability than before.
Lessons Learned
There are a few things I’d change in this build, some big and some small.
First, I’d look for a 120mm SFX power supply to make it fit easier, or source an SFX-L power supply that doesn’t have the power output in the center. Modularity is nice, but it really gets in the way of the drive cage fitting properly.
Second would be an HBA card which had ports going up, relative to the plane of the motherboard, instead of sideways. This would allow one to more easily use the fan baffle and route cables cleaner. It’s likely that there are equivalent cards, or identical cards in every way, but differing in port orientation.
Third would be going SATA and not SAS for disks. SATA are easier to source, cheaper, and they run cooler. There’s an argument that SAS are more durable, but at what cost? Also, read on to find out why SATA can be better.
Fourth would be to buy that ASROCK AMD board with 12 onboard SATA ports, or any other board with similar capabilities meeting the criteria. This would eliminate the need for an HBA card, opening the possibility of running a GPU in the case for VM gaming or other operations. It’s also more power efficient, as HBA cards do use 7-15W in normal operation.
Last Words
TRY it first. It doesn’t matter what hardware you have for CPU, motherboard, and RAM, as long as it meets some kind of minimums for unRAID, or TrueNAS, or whatever. Get 2-4 drives into an enclosure with a USB stick or boot disk. That’s all you need to get a NAS set up. Try it and I think you’ll find that you will next be thinking, as I did, about how to build it better.
Or shoot for the moon!
More images
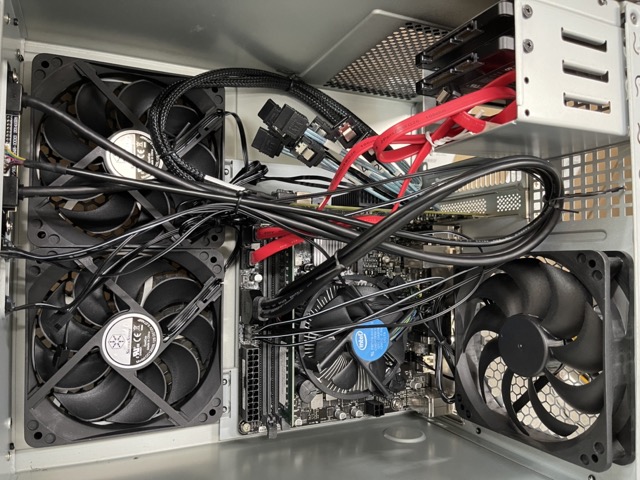
Core i7 9700 with 8GB RAM on the ASUS PRIME H310I-PLUS motherboard
Back side of the ASUS PRIME H310I-PLUS showing an SATA m.2 250GB WD Blue drive that was included with the board. Don’t @ me about it not being NVME.
Eight 8TB HGST SAS disks. Thanks ElForesto!
Motherboard and SSDs installed. Note the 2.5″ four-disk cage in the top right.
Cables and connectors connected to the motherboard so that the switches and ports work. A little messy, but it’s a tight fit.
9207 HBA card with the GPU support bracket installed on the 3.5″ drive cage. These touch before the cage can be screwed in.
The GPU bracket was removed, improving clearance for the HBA card and also making airflow better over some of these hot SAS disks.
It boots! This testing was done with the HBA card installed and running Windows 10 from the m.2 drive on the motherboard. Stand-in power supply did pretty good during testing.
Badblockssssssss
HBA 9207 as shipped. No updates or changes made after I confirmed that it and unRAID saw the drives.
2.5″ drive cage. I did move the lower SSD to the bottom in order to better facilitate the SATA power connector shape and orientation.
One of the fans gets a goofy face, while the other has to do without. This picture also shows how the HBA card’s port orientation is less than ideal with this case.
The SAS disks lit up LEDs on the backplane, whereas the SATA drives did not. Also, SilverStone shipped these labels with the case, on which I put the drive serial numbers. This is important if you need to swap a disk and are not sure which one needs to come out without doing a full roll call.
If you’ve not heard of the pi-hole, well, let’s fix that.
Ads are something that browser plugins can fix, but what about mobile apps, or all of the other circumstances where another program can’t block or protect you from intrusion or tracking?
pi-hole was software originally designed to run on the Raspberry Pi, a small, cheap computer that has the power of a mobile phone. This is plenty for doing simple tasks, even when some of them are a decade old.
The idea is this: when your app or site or other software requests data, the pi-hole will look up the domain name and compare it to a list of known ads-serving places. If the name matches, the pi-hole blocks it and nothing happens. If it’s not on the list, it’s resolved properly and transparently.
Ideally this is completely done without the user noticing. DNS servers are one of the most important parts of the internet, and also one of the biggest problems. It’s also a very good place to filter requests for devices on a network and this makes it far more effective than software on a device.
I’ve use pi-hole on a Pi B+, 3, and in a Docker container. The last of which is my current home setup, but we’ll be discussing the use of pi-hole on an older Pi B+. This setup guide was inspired by use in a location that doesn’t have daily use during the year and where little professional work is done. It’s also a place where the network speed is lower than in more suburban areas or cities.
Device and setup
Make sure that your Pi, no matter the generation, has a decent power supply providing at least 1000mA. Insufficient power will affect performance of the Pi, which we don’t need to have.
Make sure you have an SD card of at least 4GB, and preferably larger. The Pi does store logs and this can cause issues when space is a problem. A faster SD card can help, but isn’t critical.
Download the Raspberry Pi Imager from here and make sure that you don’t want any data on the SD card. Start the imager and select the Raspberry Pi OS (other) option, then Raspberry Pi OS Lite (32-bit) from the menu. This will install the Pi OS but not use space or resources for a graphic interface. We’ll be setting up pi-hole on the command line and it’s quick and simple to do without a mouse.
After setting up the SD card with Pi OS, assemble the Pi itself and get it set up with a display, a wired network connection, and a keyboard. Start the Pi by plugging it in, and wait for it to boot. Go through the setup guide and create a user name and password. Select language, and other. When setup is finished, you’ll be presented with a command prompt.
Note that you may have an issue using the Enter key on some keyboards. Use Tab to move the selection box and Space to select. I only had this problem on a B+ using a keyboard designed for macOS during the Pi OS setup. Subsequent uses of the Enter/Return key worked as expected.
At the command prompt, type the following:
sudo apt install git
This will take a few minutes, depending on your Pi. You’ll be prompted to agree to install at least once. Git will allow you to download the pi-hole repository installer from Github with ease. Following the install, type this in at the command prompt to clone the pi-hole repo:
then run the installer with the following command:
sudo ./basic-install.sh
Follow the setup instructions. This is the basic installer, so it goes without saying that this is the quick and easy configuration for a pi-hole. If you want to make changes later, there are guides for doing so, as all settings are available to be changed either through the web interface or a configuration file.
Pay special attention to the final screen that the pi-hole installer shows. It will tell you very specifically that the IP address on your local network the Pi has been assigned, that it should be set as a reserved address on your router, and give you the password for the web interface. I recommend using a phone to take a photo of this, at least temporarily.
Depending on what kind of network setup you have, the DHCP reservation may be more important than in others. Some IP address assignments expire quickly, but most modern networks do not recycle IP addresses for devices too frequently. This can be an issue if the pi-hole is used in an environment that has a lot of new clients, like a salon, coffee shop, restaurant, or other public space.
Changing your DNS setup on a router is also pretty simple, in most cases, but can have some quirks. In the Ubiquiti Amplifi mesh setup that I have used, it needed a few extra tweaks to get working right. I will recommend that you set the pi-hole’s IP address as the Primary DNS server but that you use a known good and safe DNS server as the Secondary DNS. Don’t use your ISP’s DNS IP unless you trust that they’re not using it against you.
The idea behind not sending all traffic, at all times, through your pi-hole is for DNS reliability. If the Pi has issues, is overwhelmed, or is otherwise unresponsive to a request, a device can use the Secondary DNS address to resolve the request. If you configure your DNS to only fulfill DNS requests from the pi-hole, requests would fail completely if the pi-hole does not respond.
Test it by loading this page on a device and seeing if ads show up. Make sure the device doesn’t have a native ad blocker enabled, of course.
Final Thoughts
A pi-hole is a neat thing to add to your network, especially if you have a device available and the time to set it up. It does take a little skill, but anyone with command line and Linux experience can set it up quickly. If DNS is configured with a fall-back server, there are no risks to your network. Setting up a DNS reservation is also an interesting thing to do if you haven’t done one before.
My hopes for this guide is to have you utilize a device that might otherwise not be using. The benefits outweigh the time spent, and I enjoy looking at the admin panel for the pi-hole to see which services are blocked and how many times. Looking at network clients to see who requests the most allowed and blocked services will also give you some insight into how many “smart” devices on your network call home frequently.
A recent need to have a compact, simple device setup that could connect to a streaming service and play music recently came up. The idea is to have something that could weather a power outage, network drop, or just start working when plugged in with power and ethernet. One station, no web interface, no keyboard or mouse. Just power, network, and audio out.
The Raspberry Pi has been around for over a decade and has all of the necessary components to do this on the standard Pi 1/2/3 series. Pi W and Zero models would require additional hardware to output sound or use a wired connection, but can work.
I chose to try something first on an Pi B+ and later on a Pi 3. The B+ worked really good, especially considering it’s age. I’ve had this unit since 2012 and it’s still competent at doing basic tasks. Playing music while running a web server? Easy.
Volumio is a free, easy-to-install operating system package that suits the Pi well. It’s mostly used by audiophiles who pair a Pi with an external sound card or DAC. It can stream local media, cloud sources, and some streaming services. It will also fit on a somewhat small sized SD card, which is also nice.
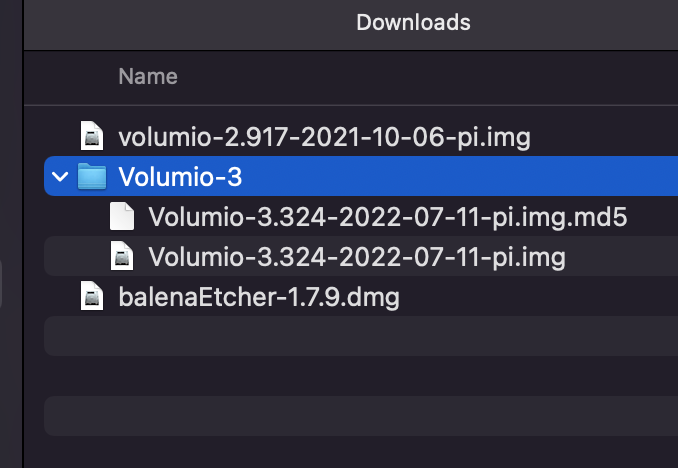
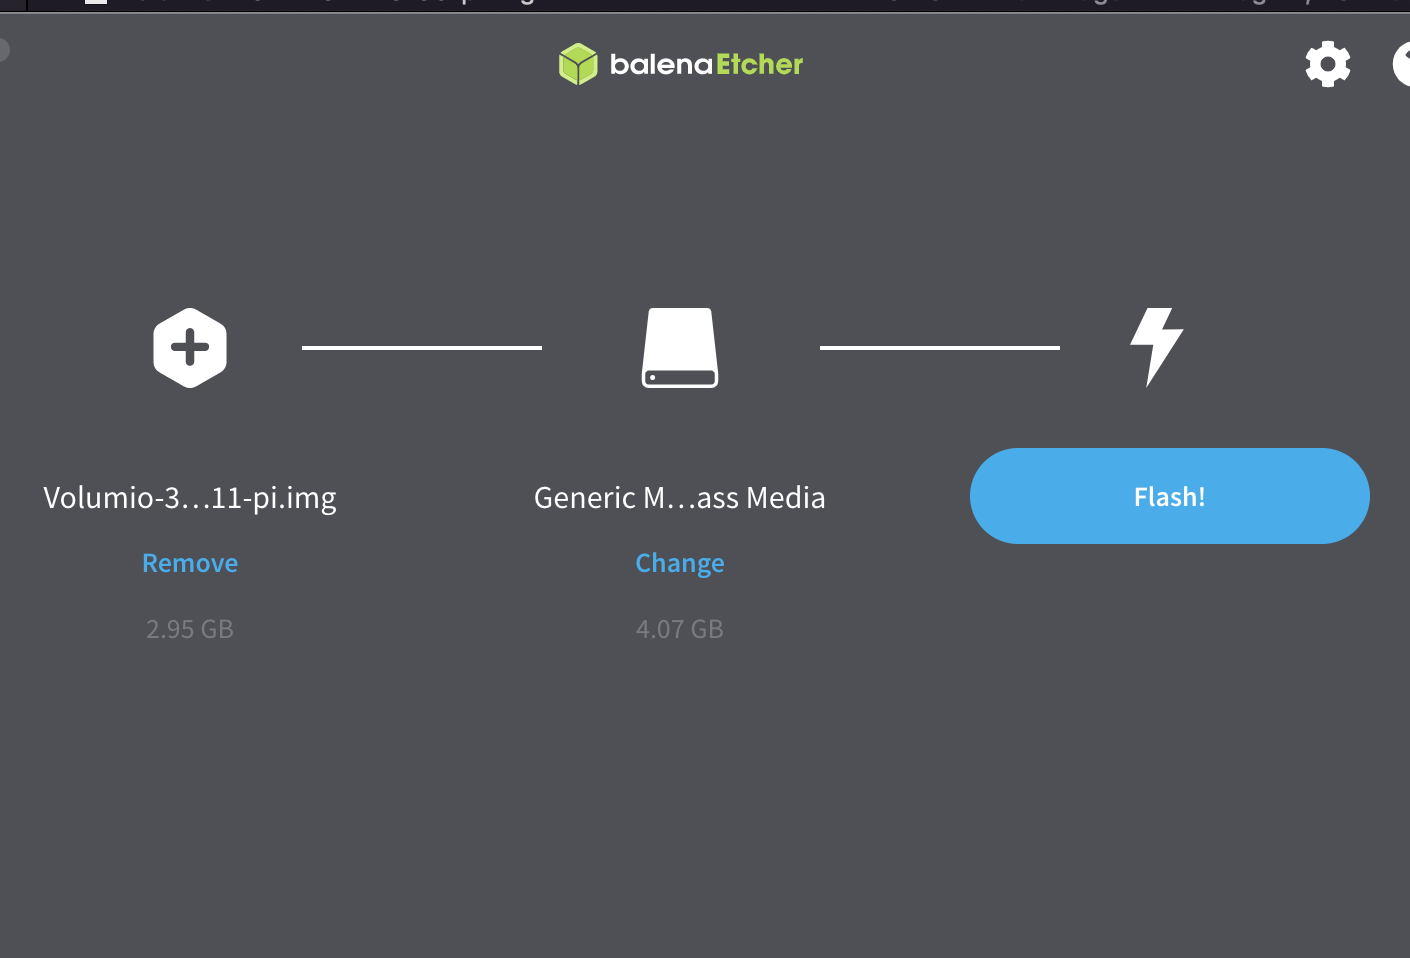
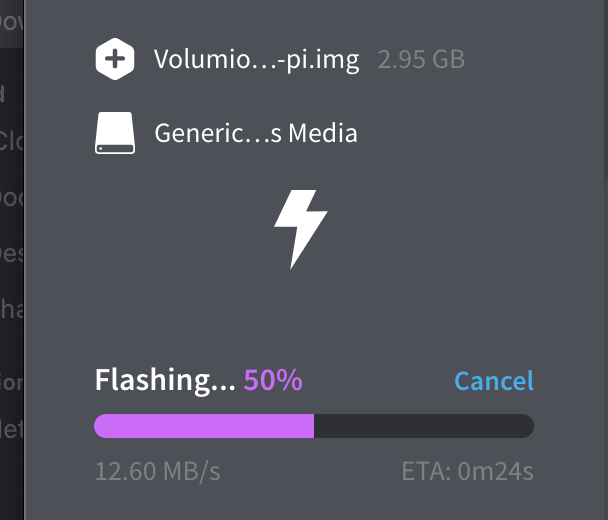
Installation is simple from the Volumio site, but version 3 complicates things. Version 2 supports a plugin that makes this task easier. I’ll include instructions for both. Download the latest version of Volumio from the website, or get the final version of Volumio 2 from here: https://updates.volumio.org/pi/volumio/2.917/volumio-2.917-2021-10-06-pi.img.zip
A utility on macOS like Balena Etcher or Win32DiskImager on Windows can get the OS installed in minutes. Once booted, you visit a web page hosted on the Pi running Volumio on the LAN. Usually it will resolve to http://volumio.local but finding a local IP address is more reliable in my experience. YMMV.
Once booted, name the device if you want it to do something else and pick your sound output. This setup will be using the 3.5mm audio jack on the Pi by default, but testing with two USB sound cards has been successful without changing the output after full setup.
Once you’re booted up and running, let’s go find out how to get a stream loaded.
In Version 2, let’s navigate to Plugins, then select the Miscellanea option under Search Plugins, then scroll down to AutoStart. Install it, then under Plugins, Installed plugins, make sure AutoStart is on.
Navigate on the left main menu to Web Radio. Look for the My Web Radio option but don’t click on it. All the way on the right side look for the three vertical dots and click on it, then select Add WebRadio. Name the new entry, and paste in a URL to a .m3u for your favorite streaming source.
Test playing the stream and make sure it works. If you want to use an external USB sound card or DAC, go into Settings and Playback Options, then make sure the Output device is right. If you change it, save it after.
Test again!
Now, with the audio playing from your stream, try restarting the Pi. Do it nice the first time, from the web interface, and make sure it works. If it doesn’t, double-check that AutoStart is enabled. If it does, let it keep going and then pull the power. Mean, yes, but we’re testing here…and see if it boots and plays.
Version 3 doesn’t have a plugin like AutoStart, so we have to get a bit hackish. Buckle up!
First, navigate to the address for your Pi and add a /dev to the end. This gets us into the developer menu where we can do fun things. The only setting we need this time around is SSH, so enable it. Don’t close that tab, because we’ll be back for something else including disabling SSH.
We need to use this neat plugin from Github that a user made. Go to this URL and have a peek around to make sure it’s not going to mine dogecoin on your pi, then either launch PuTTy, Terminal, or an equivalent and SSH to your Pi. “ssh -l volumio ipaddress” and password is “volumio”.
Look to this guide and follow along: https://volumio.github.io/docs/Plugin_System/Plugin_System_Overview
OR try “git clone https://github.com/lukeIam/volumio_custom_autoplay” to get the repository, then cd volumio_custom_autoplay, and then “volumio plugin install” to get the plugin installed.
Follow the above instructions to add a Web Radio stream and start it playing.
Go back to the web dev interface, as in ip/hostname plus /dev, and copy the whole Player State entry. Remove the /dev and go to the Plugins entry on the left side, go to Installed Plugins, select Custom Autoplay, then Settings. Make sure the plugin is enabled, then paste that stuff into the Command box and click Save. Restart the Pi and see if it works!
The Pi B+ and Pi 3 work great and are very competent devices for this simple task. Imagine a situation where you may need an audio stream, always the same for a while, but that just works. Coffee Shop, garage, lounge, man cave, conference lounge…you get the idea.
Until the past two weeks I’d only owned two Uninterruptible Power Supplies, aka UPSes, but that’s changing a little bit for a few reasons.
My first was a Cyberpower unit purchased in the very early 2000s from one of the Office stores, aka Office Depot, OfficeMax, or Staples. It was 750 or 1000VA and serviced me well for a few years but the battery failed earlier than it should have. I liked the idea of a UPS, not only for it’s power backup but that it conditioned the incoming power and gave a much better and more consistent output than one could expect from a wall socket.
Less than a year later I purchased an APC BX1000, likely also from another Office store deal, and it worked great for much longer than I expected. APC is the name in UPSes around the world and I was bummed when the twin 7.5ah cells died after what was possibly 10 years on the job. At the time the replacement cells were more expensive than I was comfortable spending, so it went into a closet and sat.
Recently, however, a local recommended a site that I’ve now used for very affordable and reliable cells, The 3.5ah and 7.5ah cells are usually about $11 each, and they ship from the US out of Nevada in a USPS Flat Rate box for more than the cost of an individual battery. Batterysharks carries a LOT of batteries, but when replacing the twin cells in my BX1000 I just needed a direct replacement.
Being careful to remove the cells, which hadn’t expanded, leaked, or otherwise deformed, I was able to install the new cells with the OE harness that places one battery, inverted, above the other, as this UPS is a tall tower. Other applications vary, but smaller UPSes usually only require one battery and no harness.
The cells I got from Batterysharks did indeed revive the old BX1000, and I still had the weird USB-to-RJ45 communication cable that it came with. I even had an old version of APC’s PowerChute software, which I knew was compatible with this model and it showed green across the board.
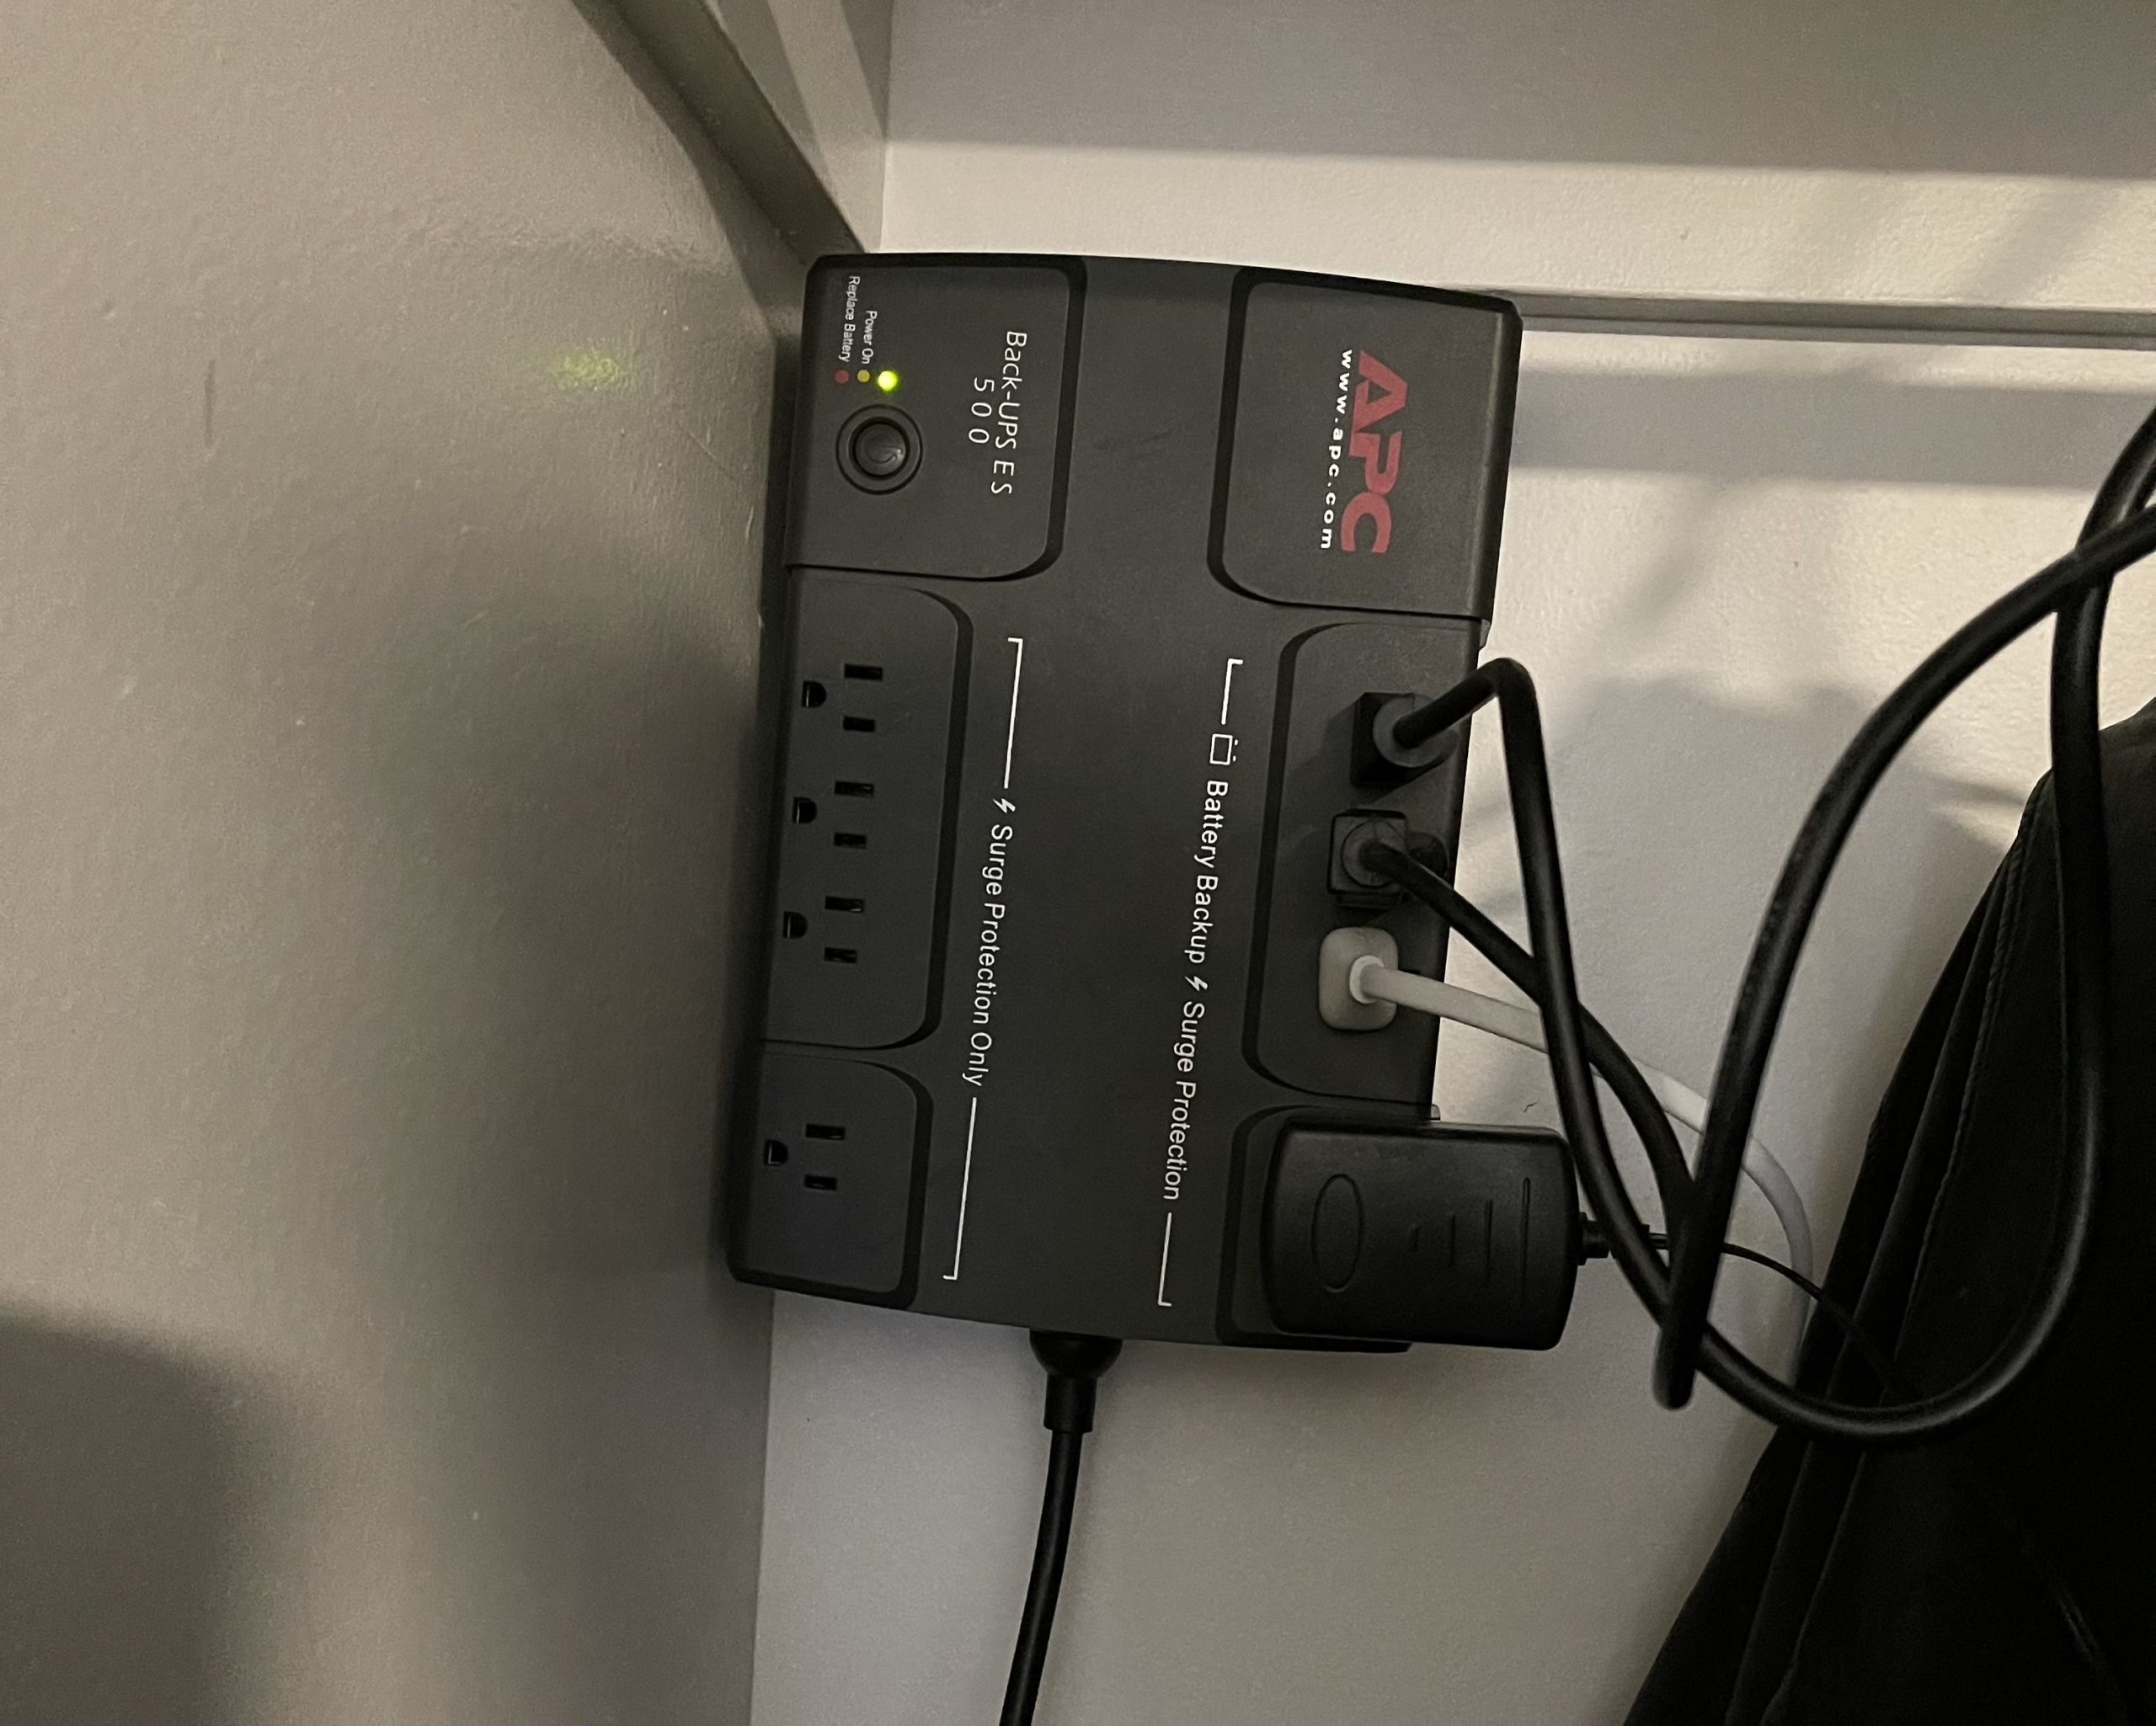
Stoked at this revival for under $40, I remember that a local university frequently has older UPSes that have failed batteries on sale to the public. The cells are usually distended and are always removed prior to sale and recycled. I was able to buy two CS 500, one ES 500, and an ES 350 APC unit for a total of $10 after some haggling. Good thing, as when I tested all four of these with the bad cells from the BX1000, only two of them acted properly. A third gave a weak On Battery light, while the other did nothing, not even an arc when plugging it in.
Knowing that I had a working CS 500 and ES 350, at the very least, two more cells were ordered from Batterysharks. They arrived in a week or so and, just as a final test before sending the two previously dead units to the recycler, I popped the 7.5ah cell in to each of them. I guess they were grumpy before, but now both of them powered on and acted completely normal. Great!
Knowing that I preferred the ES form factor, it being a super-sized power strip instead of a bread loaf, I immediately had a use for both of them. One went to a laptop and PC setup in the basement where I have done some streaming and do a lot of music listening and rating for my channels on SomaFM. The other is now wall mounted in a basement bedroom closet where my NAS, AP/router, and other equipment resides on a shelf. The ES has provisioned holes for vertical and horizontal mounting on a wall, so a few measurements later I had it all up and ready with the ES 500. I’ll be adding the communication cable to this soon and let my NAS monitor it’s status and get alerts for power failures and shutdowns.
In all, the experience with all five of these APC UPSes has been positive. The connectors are robust, the fit is very good with the SigmasTek cells from Batterysharks
Update – 03/27/21
I was woken out of sleep last night by the beeping of a UPS. My ES 500 APC unit, powering a NAS and AP, was doing that intermittent beeping these units do to inform you that something’s wrong. No power outage had occurred. I turned it off, then back on, and it started beeping more rapidly, acting like the battery was bad. I popped the cell into both of my CS 500s, which have been unused so far, and they lit up like Christmas trees also. So, then I swapped the ES 500 for the ES 350 to get things back up and working, while leaving the other cell in a CS 500. It had been making the mid range hum sound like it was charging the cell, so I figured I’d let it. Lo and behold, after about 5 minutes it turned on and is acting normal and sounds like it’s still charging. Perhaps the ES failed because it’s charging circuitry has issues. I’d rather the UPS fail, in this case, than the cell.
I’m lucky enough to be part of an extended family that has property in SW Wyoming. It’s somewhat close to a very famous city that millionaires love to buy homes in and drive prices up. It’s a lovely place made of actual timber from Oregon, and it has enough space that a lot of people can be there.
Surprisingly to me, when you can walk out the door and be in a national forest, people prefer to be on their phones (DSL there works) or watch movies (instead of enjoying the night sky). Because of this desire, most of the family has sent their DVD and Blu-Ray collection up to live there. The problem with this is that DVDs suck, they are usually scratched and will only get worse, and browsing them in a sleeve is tedious.
I decided to make it my task over the last year to rip all of the media I could get my hand on, whether owned by my family or the extended one. Add to that all of other content which I’ve come across during the years and now we’re talking. It’s been an interesting, slow process, but it’s also allowed me to figure out what software like Kodi can do if you give it something to work with. I had never previously used any scraping tools, and now I understand why these exist and how best to use them.
I started the hardware side of this modestly, with a spare RPi Zero W and a copy of LibreELEC installd from NOOBS. This seemed like a good platform to start with because Kodi on a PZW doesn’t need to do much but make it’s shares available. It’s not streaming video out, just streaming data over wireless to other devices. Some tinkering led me to find that there are editable files like samba.conf which can make this sharing even more deliberate. For example, by default Kodi shares all of it’s directories over SMB. This isn’t useful to a septuagenarian on an iPhone with VLC browsing directoreis. Being able to explicitly share only the folders you want is very nice. It’s also handy to make everything read-only because, well, duh.
The PZW was working fine, but it can only possibly power one external drive at a time. I got a neat 4-port hat for it that expanded it’s capability, but without a second power adapter, running more than a single laptop drive wasn’t possible. I was also restricted by the drive sizes I had, the largest of which was 750GB. As my content went over this, I started to think that something more streamlined was a better idea, even though the tinkerer in me loved the PZW solution with Kodi.
An older QNAP TS-119 with a 4GB WD Red disk came up for sale locally and I pounced on it. QNAP still supports these devices with security updates nearly a decade later, and it’s an interface I’m familiar with. Some tweaks here, some very patient copying of 1.5TB there, and now I have an all-in-one solution to the storage end of the equation. It’s only a single-core device from 10 years ago, but it works OK. It spins down the disk if it’s not used, so it can be relatively power efficient. It has a power button, unlike a Pi, so turning it on and off isn’t a big deal.
On the front end, that’s where a lot of time was spent. Scrapers that use TVDB and TMDB rely on a properly named file, usually having the year, and most things to the proper syntax. If anyone has ever happened upon a TV series from an online source you know how they’re serialize in a Season/Episode format. This has been standardized, but it does take a bit of time to find and edit episodes of TV shows and getting the full names of movies copies straight from TheMovieDB. If you do that, and tell Kodi that your video folder contains Movies, it will go look for that and download the appropriate metadata to get information like a poster, plot, actors, and such. It’s neat, but that’s where the next part comes in.
The process of using a scraper works pretty good, but it also falls apart when you are dealing with a library that needs to be rebuilt or cleaned. This isn’t a tedious task on a modern PC, but on an older iMac it can take a while. Now think about doing this on a quad-core Pi 3 and it’s a process that takes hours.
Best practice is to tinker on a faster computer with a fast connection and get everything set up. After you’ve figured out where things are going to be it’s time to add it all to a slower front end like Kodi/LibreELEC on a Pi or an older, slower computer. Telling these to update the library on startup is a good idea because you’re probably not adding hundreds of new titles or files, but if you are, that’s when it needs time to process.
Make a directory for Movies, Music Videos, Music, and TV shows. These can all have subdirectories e.g. DVD, Documentaries, Comedy Specials, VHS, and the like. Kodi will parse them all and get the appropriate data for everything it can find in each folder. TV shows go in their own Folder/Season with proper Season/Episode nomenclature.
It’s really neat when it works. Having a niece or nephew download VLC for iOS, open it up, and four taps later they’re knee-deep in the movies they grew up watching at home is pretty rewarding. Whether they’ll use it much is almost beside the point of making it a service in the first place and figuring it out. Right?
I was trying to use VLC 3.2.2 for iOS to get to a hidden folder on a local network storage device. Some time after 3.2.0, SMBv1 stopped working right, and the VideoLan folks are working on it, but it got me thinking.
The NAS I use has a GUI web interface, and is Linux-based, so it should have some logging, simple or otherwise. Naturally it was disabled by default, because of course it was, and when I enabled it to see what it offered, I was a little surprised.
One of the various tabs showed connection attempts. which is exactly what I wanted to see. I was a bit shocked, then amazed, and puzzled, when every few seconds I saw another entry come up. These entries were from external IP addresses. They were dictionary login names trying to authenticate via SSH to my NAS. Hmm. What the hell.
First, I logged in to my router and looked at the ports I’d had specifically forwarded. Many of these were for services I wasn’t using, mostly attempts to get OpenVPN to work properly. I shrugged and deleted them all, knowing that I could add them later if needed. That didn’t slow things.
Next up I looked at the SSH settings on the NAS and decided that I wouldn’t disable the service, but rather change the port. If I need to get a shell on the NAS in the future, I can always look up the longer number and connect. Bam, that was like closing the door hard.
Relieved, I also still had a bit of a warning that I should keep watching the log and alas I did see some FTP attempts at connections. Click, Apply, and silence.
Not completely satisfied, I did some more research and found that the router I use has some clever UPnP services that automatically let connections through. Ah, okay, this made sense but how was it being….
Oh, the NAS was asking for ports to be opened via UPnP. Click, Apply, sigh.
It seems like my efforts to get OpenVPN working some months ago and default settings on the NAS and router meant that I’d made my NAS vulnerable to external attacks. Now, I’ll admit that I wasn’t super clever in disabling the default admin account and making a super complex password, but it also seems like no complex scripts had successfully connected and found their way in. At least, I hope. Any logs the system had made, if any, were likely not saved. It’s a device that I use somewhat often, and exfiltrating or messing with the system would have run alerts from my internet provider.
Check your devices. Make sure they’re only asking for what they should be given. Look at some logs for an hour or 24. Change your passwords, even on “internal” networks, because they’re only safe if you didn’t accidentally poke holes in your network to make them more public than you wanted.
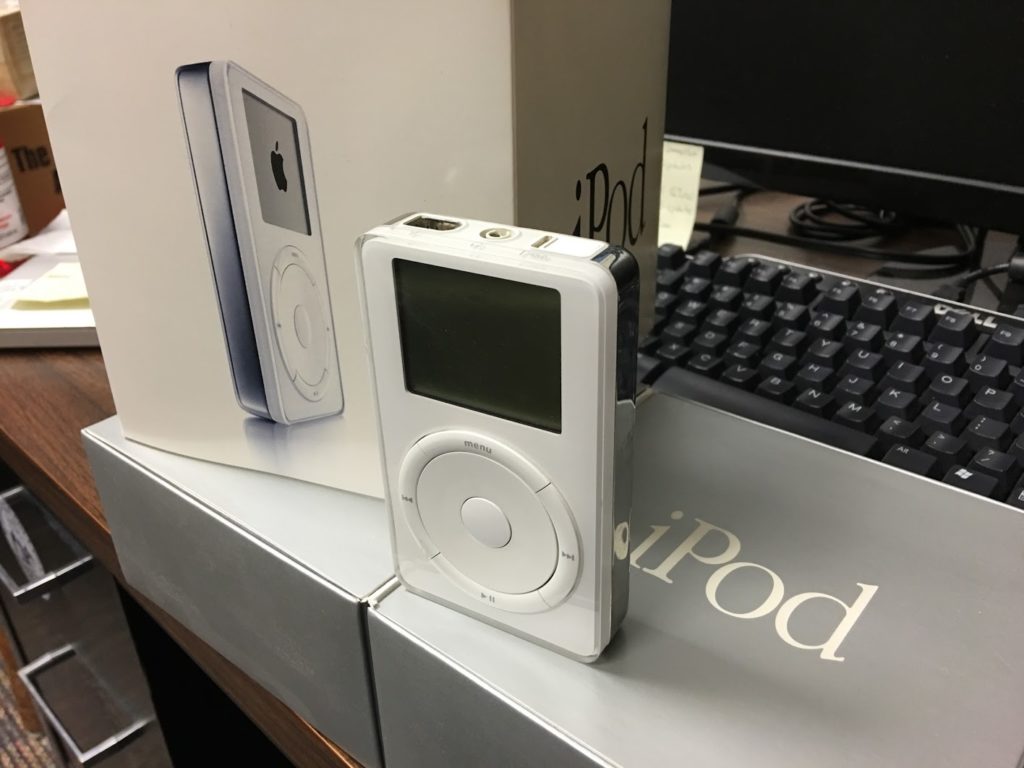
I’ve had a long history with the iPod. My first was a 5GB, Macintosh-formatted, first-generation iPod with a Firewire interface. The battery wasn’t very good, and those models had a bad habit of breaking the Firewire plug, so it’s good that Apple figured things out with the later versions.
My next iPod was a 40GB Video model. Open box from Best Buy, it was probably still over $450 way back then, but man was it nice. I used it on planes, for a radio show, and in cars. I sold it later to get another one, an 80GB I think, then eventually got the mother of all iPods, the 160GB, in 2007. iPod Touch was next on the list, and I never really looked back when touch screens, wireless, and an App Store were available.
We didn’t realize it at the time, but those who were fascinated with the iPod and audio quality became fans of the device because it used various versions of the Wolfson DAC. Other sites have ranked the best iPods for sound, but all of them are before the 6th Generation iPod, which seemed to be a turn in form from Cupertino towards profit over quality.
Most iPods that weren’t flash based had actual hard drives, 1.8″ units from many manufacturers. Larger iPods sometimes had deeper cases to acommodate the thicker hard drives. 160GB seemed like a lot, and it is, but hard drives have many deficiencies to flash storage in 2019. Along with drive capacity, the amount of RAM onboard also varied, so a 30GB and 60GB iPod would have different total track and metadata capacities. Fun!
A friend mentioned off hand that he had a bunch of iPods. He wasn’t interested in them, and so they were just simply available if you wanted them. I took him up on the offer, and three of the four happened to be custom etched iPod 30GB 5G units. They may be 5.5, but the awkward part number doesn’t make it clear. Regardless, I was now in possession of some great hardware with weak batteries and failing hard drives.
iPod “Enhanced” 30G aka 5.5 PA447LL/A
To go with that aforementioned Wolfson DAC, I bought a used set of Etymotic ER-4B in-ear monitors for serious sound isolation. These were to get an awesome experience by blocking out as much noise as possible, while giving me a powerful, high-quality, balanced sound. The iPod featured a relatively powerful amplifier, and I was surprised at how well it drives the ER 4s.
Storage has been solved by one company in particular. They offer a 1-, 2-, and 4- SD card upgrade option that replaced the hard disk with a PCB housing one to four cards. An mSATA option, and CF are also available if you so desire. The PCBs are frequently in stock and ship from the UK. It can take a few weeks, and I’d probably recommend the shipping option with a tracking number too.
So, I ordered the iFlash Dual, a 128GB, 80MB/sec SD card, a replacement battery, and some tools. One after another, they showed up and piled around the iPod. The adapter arrived last, fashionably, which let me put everything together in a matter of minutes. See, I’d already done the hard part…
Getting the iPod open is tedious, but needs care. I followed a guide on the iFlash website, another two on YouTube, and yet another on the iFixit site. The latter, especially, let me to the best sequence of working the back cover off that I’d seen. With a single spudger and an old credit card, I was able to get the rear cover off in minutes without breaking anything or bending it up. What a relief!
Hard disk removal was simple and easy. Battery was a little trickier with the adhesive, but a patient prying motion along the long axis of the battery got it out in no time. That done, everything was pretty much the opposite of removal.
Put the SD card(s) in the PCB. Check. Get the PCB lined up, with the SD card facing DOWN. Check. Slide the drive cable in the slot and lock it down. Check. Battery leads bent down at the end and re-attached. Check.
I did have a foible with the drive connector, so I had to do it again, but the second time of asking, the iPod booted up. iTunes restored the iPod, and I’ve synced over 11,000 tracks to a nearly full iPod that now has 128GB of capacity.
Total cost was under $100. It helps that the iPod was no charge. Batteries are inexpensive, and SD storage per gigabyte gets more inexpensive every week. The most expensive items was the SD adapter, but it’s also the most important!.
The sound is very clear, even at 80% volume. The menus are SUPER fast. I’m looking forward to better battery life, quieter operation, and more than four times the capacity.
Would I recommend this? Only if you have an iPod 4th or 5th generation available for cheap/free/in a drawer. I would hesitate to do this on the 6G or 7G unless you’re simply interested in carrying a HUGE amount of music with you and are less concerned about subjective quality.
One of the pitfalls of getting previously-used equipment is that there can be an unexpected roadblock to doing something trivial, like a BIOS update.
While testing the INTEL-SA-00086 Detection Tool, which is a simple and easy way to see whether or not your system is vulnerable to the Spectre and Meltdown vulnerabilities (as they’re currently defined), I found a system that was running the A20 version of the BIOS. A22 is the current version.
Trying to run the update utility resulted in a request for me to enter the BIOS admin password. This is a piece of equipment that I got from another area, and while I could contact them, the Latitude E6530 is old enough that I figured someone had reverse-engineered the BIOS password reset algorithm. I was not wrong.
As soon as I saw the interface for the site that solved my problem, I recognized it after seeing it several years before to resolve the same issue.
Going in to the BIOS, and entering the Security tab, and entering an incorrect password gives me what’s called the serial number, or service number, in the format of “1234567-595B “. This code, when used at https://bios-pw.org will give you a bunch of different passwords to try. Thankfully, these older machines have no attempt countermeasures, so one can simply mash in numbers over and over.
The second or third entry was the key for my machine, and instead of letting me change the password, or just unlocking it, the code removed the password entirely. Handy! Bummer, however, for people who think that an admin password is any more than a WEP-level block against access to a system or changing of settings.
The neat thing about the site is that it seems to be based on research from a few people, and that it’s source code is available on GitHub: https://github.com/bacher09/pwgen-for-bios
I’ve been using WiGlE for some time (<a href=”https://wigle.net/”>here<a>) for Wireless Network Mapping since late 2017, when d4rkm4tter finally convinced me to try it. As an old-school wardriver, I was intrigued.
My old rig was a Compaq iPac 36- or 3800-series with a PCMCIA sleeve, a Lucent Orinoco Gold card, and either a Yagi or Omni antenna. Microsoft Windows Mobile and ministrumbler was used on the software side. I kept those logs till this year, when I uploaded them to the worldwide database.
WiGlE works by looking for wireless networks, Bluetooth, and cell phone towers, then trilateralating them with GPS. It only works on Android for mobile phone devices, and Google’s Android Pie breaks it due to severe limits on how often the wireless can be polled.
Astonishingly, I was able to find a nice Pixel for $100 from someone who’d purchased an S9 to replace it. Seemed legit, and all was well. It came with a Tech21 case and had a 3M/Scosche metal magnet mount on it, which was handy. The USB A-C cable and LG charger was worth $15 alone.
Now the issues with Android Pie are known about in late 2018, and there’s not currently a workaround to keep WiGLE able to do it’s job. The Pixel had been updated to Android 9, but hey, this is a Google device so it’s super easy to unlock the bootloader and flash Oreo, right? Right? Well…
For some reasons, most of which are stupid, but some of which make sense, Google has partnered with Verizon in the US market for Pixel sales online and in stores. This has undoubtedly helped the Pixel line sell more phones, but it enrages users like me who want to have the true Google experience, on a Google device, but without the barriers. I remember the pain of Sprint Nexus S and Verizon Galaxy Nexus owners went through, and I was hoping someone had figured out a workaround.
Some quick work to get the Android Studio and following some guides got my phone connected and I was able to shake off some cobwebs to get the proper components downloaded. fastboot was able to see the phone, but in my case, under Developer Options, the item called “OEM Unlock” was greyed out. My worst fears were coming true.
I rapidly searched for a workaround and came to an insightful, relatively clear, and eventually rewarding thread on the wonder of sites that is XDA. The thread can be found <a href=”https://forum.xda-developers.com/pixel-xl/how-to/how-to-unlock-bootloader-verizon-pixel-t3796030″>here</a> and I suggest reading the main post and comments before proceeding with an unlock.
Now, with this guide I was able to unlock the Pixel. The most important step I needed to keep in mind is that “OEM Unlock” one, and patience at that point. When I checked it after following the adb command, it was still greyed out, but after a minute or two, it lit up and I was able to successfully unlock.
After a download of the Android 8.10 image from Google, and following some other instructions, I used the “flash-all” script to get Oreo installed, and cross the finish line.
While the battery may be a little tired on this two year old phone, I still like it and will be using this alongside my Verizon G6, whose bootloader remains hard locked and to which no workaround has been found.
WiGLE works great, and I’m finding some interesting results between the G6 and Pixel, especially given that they’re both using the same Qualcomm Snapdragon 821 SoC. Must be some different antenna designs and implementations between HTC and LG.